How to Transfer WordPress Site to Squarespace
Many small business owners are choosing Squarespace over WordPress for ease of use and modern designs. But changing website platform requires careful execution, or you may lose organic traffic and search engine ranking in the process.
This blog post will walk you through how to transfer your WordPress site to Squarespace without affecting user experience and SEO.

Website migration can be time-consuming and requires technical skills. If you prefer having an expert handling this process, check out Wordpress to Squarespace Migration service.
Step 1: Identify content with traffic and SEO value
Like moving to a new home, the first steps in switching website platforms are to take stock of what you have and decide what’s worth bringing with you.
It’s not uncommon to see WordPress websites with over a hundred pages but many are empty or with low value. There are many possible causes, such as WordPress automatically generating a new page for every tag, themes that don’t get used still leave demo pages behind, old content that never get deleted, or certain plugins.
As a clean site map is better for SEO and easier to maintain, you want to remove unnecessary pages before transferring content to Squarespace.
Start by creating a spreadsheet with these columns:
Current URL
SEO Value (Y/N)
Business Value (Y/N)
Decision (Keep, Remove & Redirect, Merge with another page & Redirect)
New URL
You can use WordPress’s Export All URLs plugin to get a list of existing URLs.
Then, using Google Search Console and an SEO tool like Semrush or Ahrefs, you can check what content receives organic traffic or has SEO value.
Organic traffic: Look at Google Search Console’s performance data to see which pages have received clicks and impressions over the past 12 months.
Search visibility: Look for pages that receive impressions even if they get few clicks. These pages may have potential value that isn't reflected in traffic yet.
Backlinks: Use an SEO tool to see whether other websites link to the URL. A page with few visitors can still be worth preserving if it has valuable backlinks.
Rankings: Look for pages ranking for relevant search queries.
Page with low word count or older files can still have SEO value, so it’s worth using an actual SEO tool to check, rather than relying on guesses.
The next column, business value, is based on your judgement of whether the page is still useful for your business.
If a page has no SEO or business value, it should be removed and the traffic currently going there should be redirected to homepage or a more relevant page (we’ll explain how to redirect traffic in a later step).
If a page has low value, it should be merged with another page and also have its current traffic redirected.
After you complete the Decision column on the spreadsheet, make the necessary changes - remove or merge content - on WordPress. Then note down the new URL for each instance of change.
Btw, blog posts in Squarespace have URL convention
In Squarespace, collection pages like blog or shop will have URL in a format like:
mywebsite.com/blog/blog-post-name
mywebsite.com/shop/p/product-name
There is no way to remove the middle part. You can swap it for another word, but you can’t remove it completely. This is different from WordPress where any page can simply be mywebsite.com/post-name.
While having to redirect several pages can be annoying, the enforced URL structure creates a more organized site map, therefore is better for SEO and overall a good thing for your website.
Step 2: Create a Squarespace account
Next, sign up for a Squarespace free trial (this’s an affiliate link).
The free trial gives you 14 days to try the tool. When it comes time to pay, you can use code SQSP50 to get 50% off. If they stop that coupon code at some point, use SQUARESPACE20 to get 20% off.
Before importing content from WordPress, you should set up the following in Squarespace:
Site title - change to your site’s name
Logo - upload the logo image if you have it
Site style - configure colors, font, spacing…
Tip: Max page width should be between 1200px and 1440px
Built-in domain - Squarespace will provide a built-in domain with a random name like “squirrel-283n3.squarespace.com”. You can customize the first part of the built-in domain to make accessing your account easier.
Don’t move your real domain to Squarespace yet. This should be the last step to minimize disruption.
Site availability - change from private to password protected so that you can visit the site’s frontend with the built-in domain.
Invite contributor - if multiple people will be working on the project.
Step 3: Import content from WordPress
The import feature makes it much faster to move content from WordPress to Squarespace. As plugins can interfere with the import, you should disable WordPress plugins before taking the next step.
On WordPress, go to Tools > Export. Select All content and download export file.
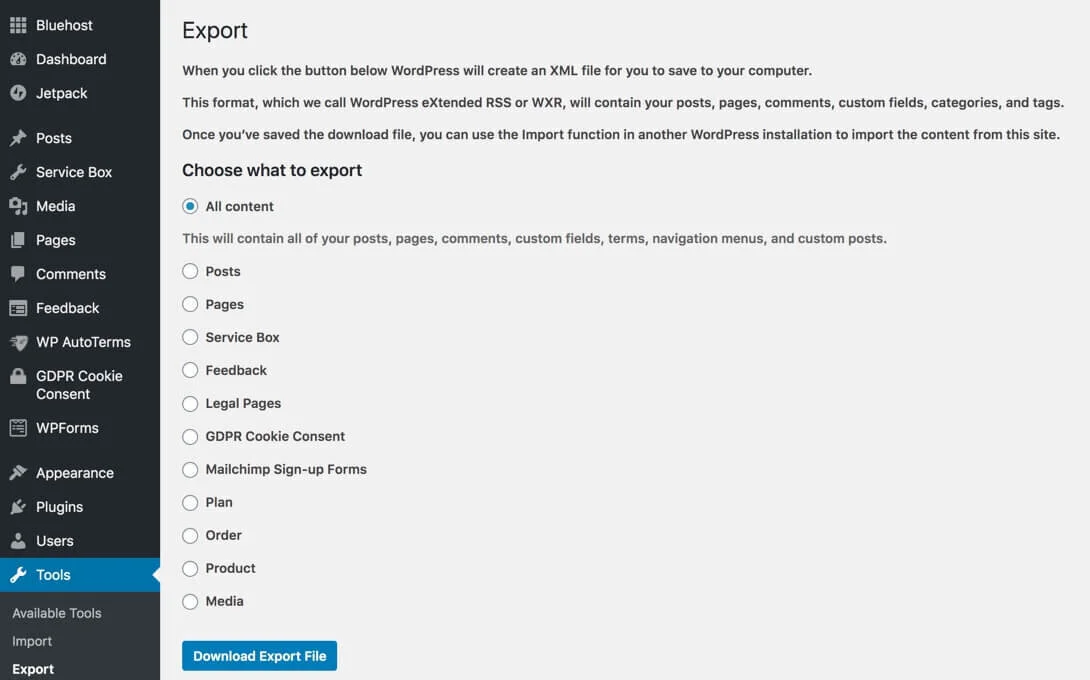
Export content from WordPress: Tools > Export
In Squarespace, go to Settings > Advanced > Import/Export > Import.
Choose WordPress as the source platform, then toggle to the Advanced tab.
Drop the XML file you’ve gotten from WordPress there and click Begin Import.
After a few minutes, you’ll see a Success message.
Imported content will show up under the Not Linked section. If you don’t see them after the Success message, refresh the page.
Step 4: Check and edit content
You’ll notice that Squarespace import feature isn’t a magical one-click button that does everything.
The content are mostly in place, but you’ll still need to organize pages, check to make sure nothing was missed, and make edits where necessary.
This step is heavily dependent on how your WordPress site was designed.
There are various small details you may need to edit. For example, you may need to adjust spacing between sections and ensure the text are in correct heading style (for example, page title should be heading 1, and other headings on the page should be heading 2, 3, or 4 in correct hierarchy). You’ll also need to adjust the mobile design to ensure the site looks correct on small screen sizes.
Step 5: Add SEO settings
Data from Yoast or another SEO plugin won’t get transferred to Squarespace automatically.
To add a meta description for a page manually, go to Squarespace Website > Pages. Hover over a page and click on the gear icon to open Page Settings. Go to SEO tab. Here you have the option to use a SEO title different from the page title, and also where you can add meta description.
You can also use Squarespace’s AI feature to generate meta description and image alt-text on scale.
Open the Page Settings popup for the homepage and go to SEO tab.
Instead of the regular settings, you will find a button that leads you to site-level SEO settings. Change your homepage title to include your business name and what you do. Title format for pages and items can be kept as is. Then, save and close this settings popup.
After you close the popup, you will find yourself in the SEO/AIO tab of Squarespace. This page shows “Pages with metadata” and “Images with alt text” on your site. When you click on them, they will also give options to auto generate these information.
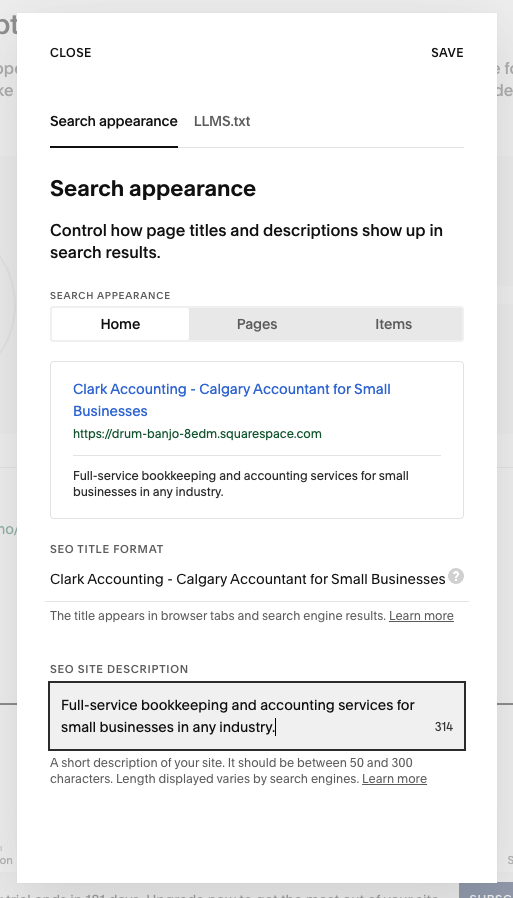
Site-level SEO settings
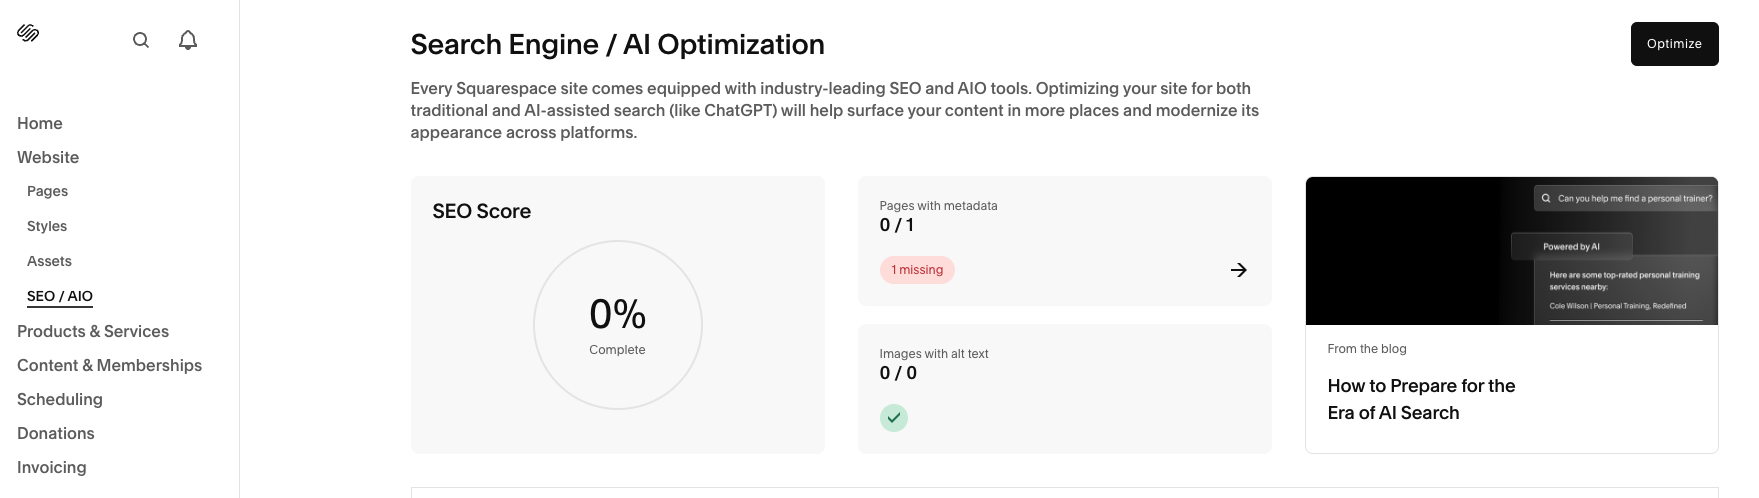
Search engine / AI optimization tab
Step 6: Set up 301 Redirects
Page URLs can change in the process of moving from WordPress to Squarespace.
For example, if your WordPress blog posts’ format is mywebsite.com/essential-guide, but on Squarespace it’s mywebsite.com/blog/essential-guide, you will need a 301 Redirect (permanent redirect) to point the old URL to the new page.
This step needs to be done carefully, otherwise users will get 404 (not found) errors. Use the spreadsheet you have created in the first step to note down all the redirects and double check before entering them into Squarespace.
In Squarespace, head to Settings > Advanced > URL Mappings.
Use the following format: /old-url -> /new-url 301. Example: /web-design -> /website-design 301
Click save.

Be sure to redirect old URL to new URL
After launching your site, go to Dead Link Checker and enter your website domain. The results will show any links you have that point to a 404 Error (page doesn’t exist).
Step 7: Move domain from Wordpress to Squarespace
By now, everything is almost complete. But before connecting your Squarespace site to the official domain, test the new website and ensure there is no error.
To test the site live, purchase a subscription plan and set the site availability to public. You can then test the site with the built-in domain on different devices and speed tests.
When you feel confident about launching, there are two options to move your domain from WordPress to Squarespace.
Connect domain. The domain lives outside of Squarespace, but its DNS points to the Squarespace site. This is the faster approach and often take less than 24 hours. You will change either name servers or DNS records to point to Squarespace, instead of WordPress hosting.
Transfer domain: If you prefer to manage everything in one place, you can transfer the domain to be managed within Squarespace. This can take up to 15 days, depending on your domain provider.
We recommend connecting domain because it minimizes disruption and is easier to undo if you need to.
Step 8: Request Google indexing
Once your new Squarespace website is live, submit your sitemap to Google Search Console. If you aren’t sure how to do this, read Verify Squarespace with Google Search Console.
After a few days, Google will let you know if all the pages have been indexed correctly, and if there is any error to fix. Continue checking Google Search Console over the next few months for crawl errors, indexing issues, and changes in search performance.
You should also connect Squarespace website with Google Analytics and monitor traffic and activities to identify any strange pattern. This could point to issues that need attention.