
How to Add Images to Squarespace
Images breathe life into your Squarespace website, making it more engaging and visually appealing. Luckily, adding pictures is pretty straightforward. With an extra creative touch, your website can start glowing.
Adding An Image block to Squarespace
In Fluid Engine Editor mode
How to add an image in Fluid Engine Editor mode
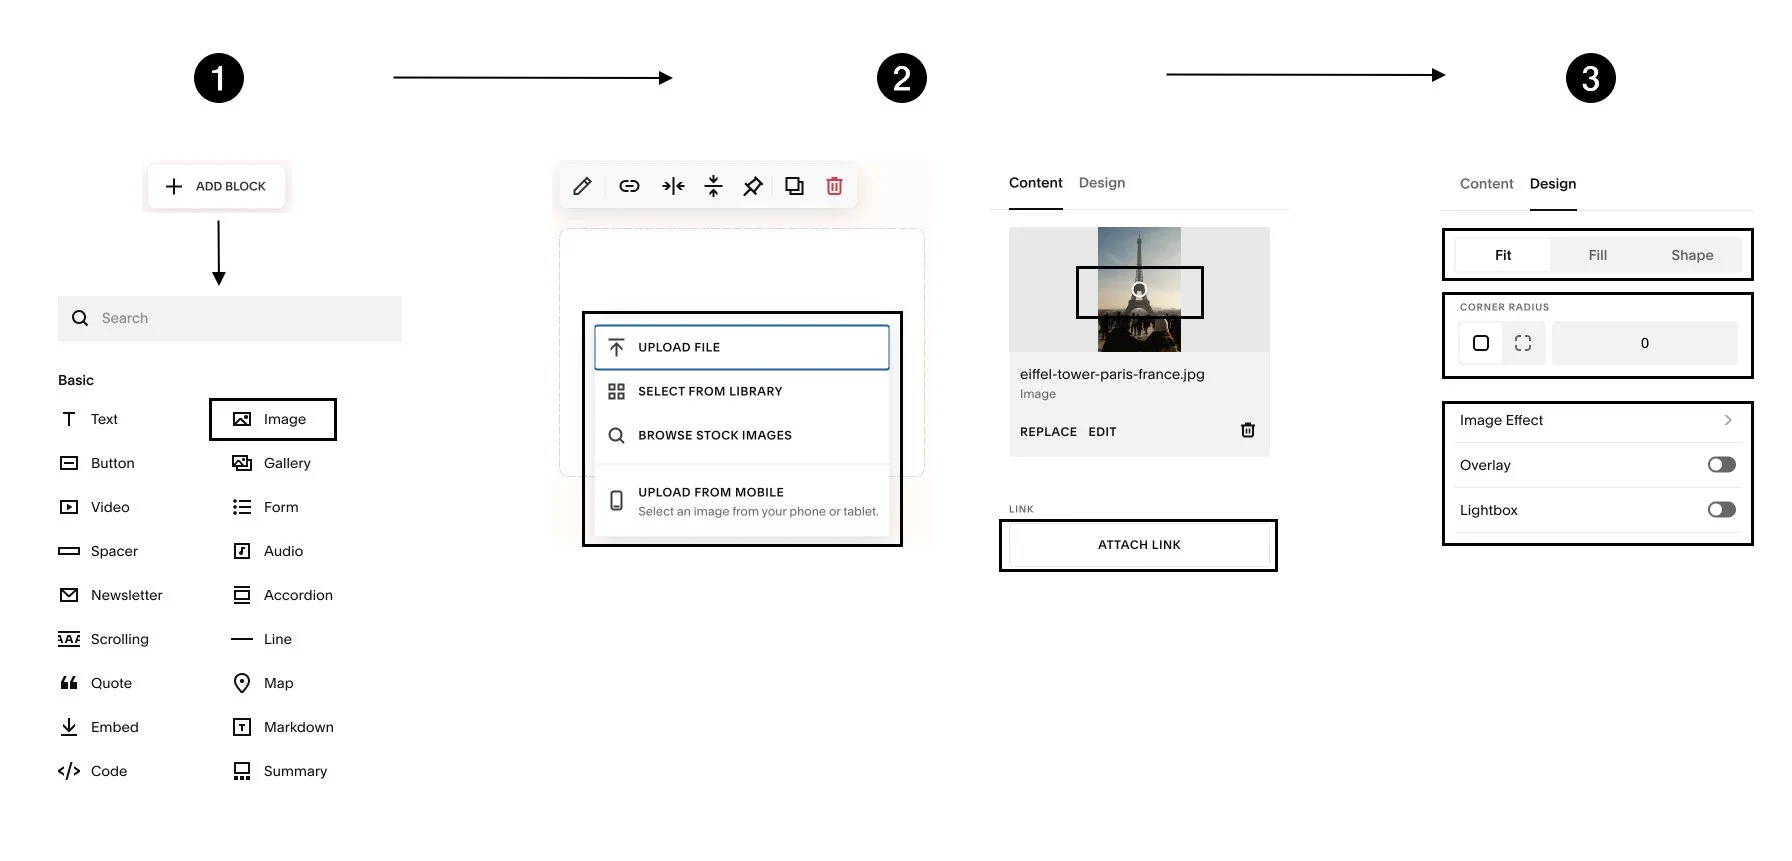
Step 1: Navigate to the page and section where you want to add an image.
Look for the button [+ ADD BLOCK] on the left side and click to open the block menu. Choose the "Image" block from the options available.
Step 2: You'll see an "Upload Image" area. Either drag and drop your image file, or click the area to browse your computer for the correct image. If needed, adjust the image focal point or attach a clickable link to the image.
Step 3: In the "Design" tab, you can adjust the styling:
Image cropping: You have 3 options - Fit, Fill and Shape
Fit: The original image aspect ratio is maintained without cropping.
Fill: The image is cropped based on the dimensions of its container. If the extremities of the image are cut out too much, you can drag and increase the container dimensions, or adjust the focal point.
Shape: The image is cropped based on a particular shape of frame that you choose.
Corner Radius: This option allows you to round the image corners, you can put in a single value for all 4 corners or different values for each corner.
Image Effect: Add some animations to your image; each effect can be further customized.
Overlay: Add an overlay color to your image.
Lightbox: This option allows users to click on the image thumbnail and view it in full size mode.
Click Save.
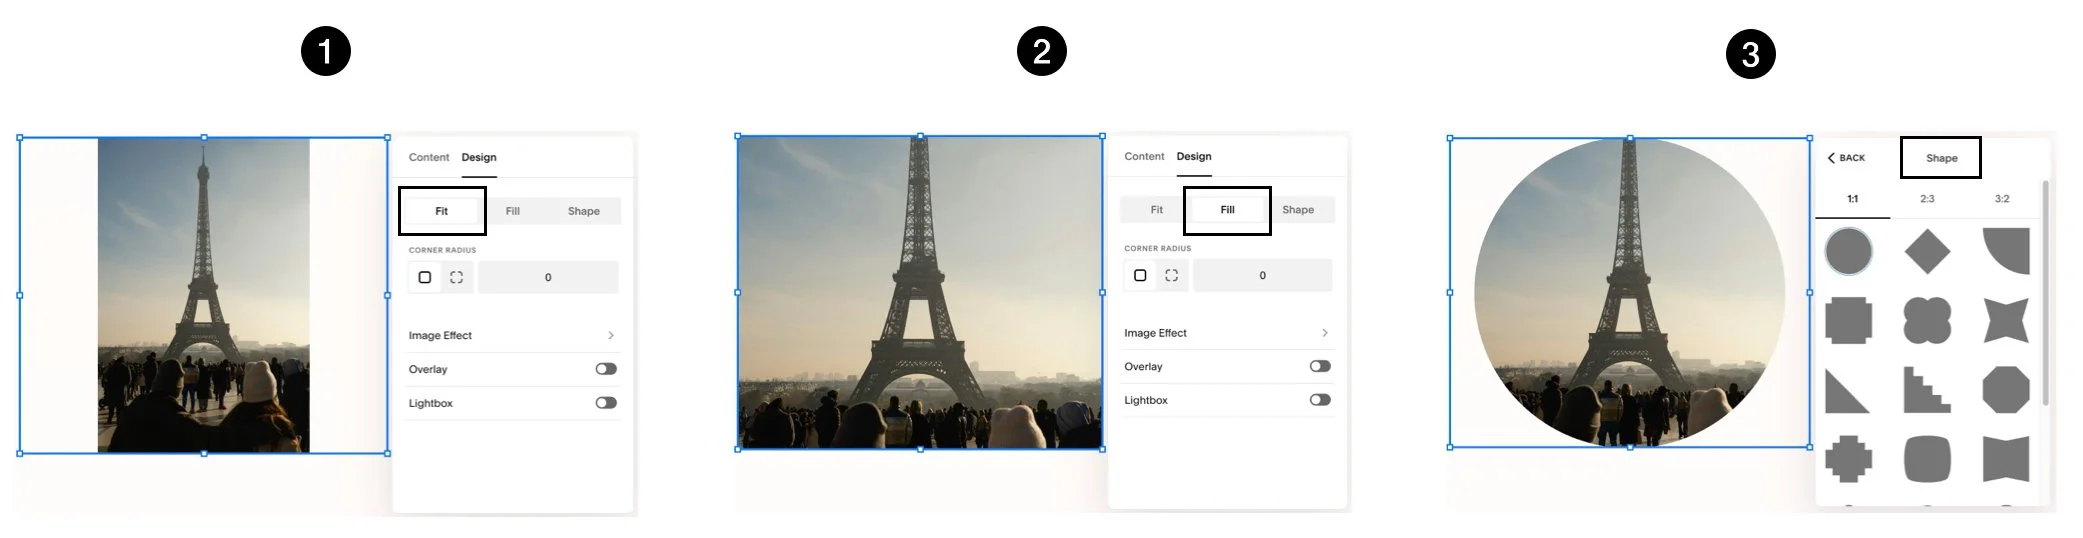
Comparison between 3 types of image cropping: Fit, Fill and Shape
In Classic Editor mode (Blog post)
How to add an image in the Classic Editor mode.
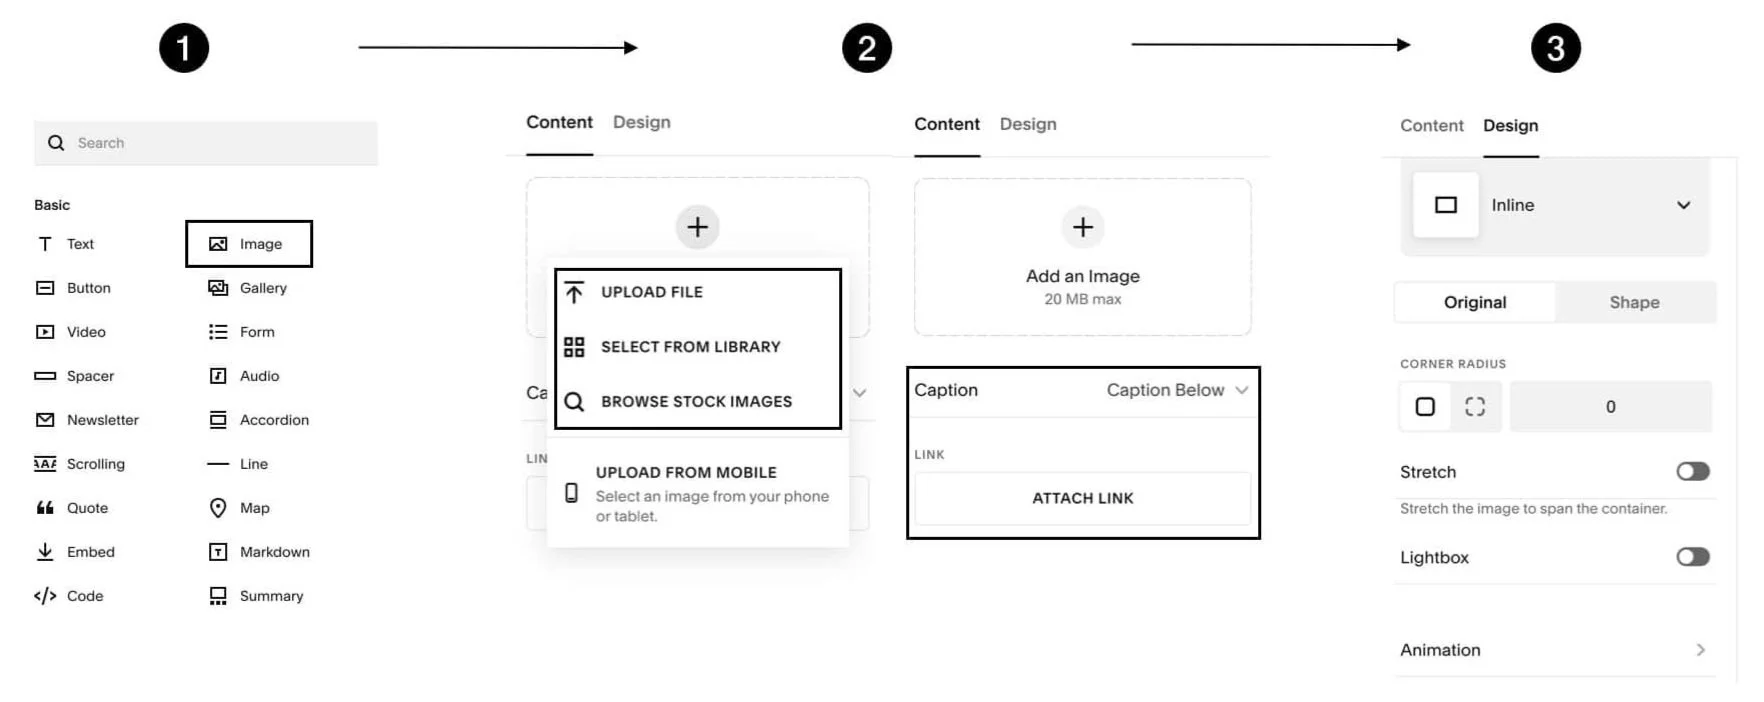
Step 1: The Classic Editor mode is still mainly used in Blog post, navigate to the post and section where you want to add an image. Look for the plus sign [+] icon and click to open the block menu. Choose the "Image" block from the options available.
Step 2: You'll see an "Upload Image" area. Either drag and drop your image file, or click the area to browse your computer for the correct image. If needed, adjust the image focal point or attach a clickable link, you can also write a image caption that will be visible for viewers.
Step 3: To adjust styling, go to the "Design" tab in your image block settings. There are several options, such as changing the shape of your image, adding rounded corners, or a colored overlay. Click Save.
Adding multiple images
If you have many images to show, instead of adding image blocks one by one, you can use a Gallery block or a Gallery section.
Gallery block
Navigate to the page and section where you want to add the Gallery block.
Click on the button [+ ADD BLOCK] on the left side and choose the "Gallery" block from the menu.
Upload images from your computer or select from your library.
You can reposition the Gallery block wherever you like in the section, or increase its dimensions simply by dragging its container.
Click on the Pencil icon to Edit the Gallery block and explore different styling options.
Gallery section
You can also add an entire Gallery section to showcase your best images.
Click on [ADD SECTION] then choose the category "Images," and select a layout you like.
Upload images from your computer or select from your library.
Explore different styling options by clicking the button [Edit Gallery] on the right.

Image Optimization Best Practices
File Size Matters
Compress your images before uploading them to Squarespace. Large files can slow down your site's loading speed. Resize the images to around 1500px - 2500px and use a free image compression tool like TinyJPG.
Naming Conventions
If you want your pictures to show up on Google Image Search, use descriptive filenames such as "red-dress.jpg" instead of "IMG1234.jpg". Consistent use of descriptive filenames boosts your overall SEO ranking and makes managing a large website easier.
Alt Text
Add "Alt Text" in the image settings. This is a description that screen readers use for accessibility and also helps search engines understand what's in your image.
For writing Alt Text, describe only the part of the image that is relevant to the information you’re trying to convey. The description should be concise and don’t include words like “picture of…” or “image of…”.
✨ Tip: Try an AI Alt Text Generator to help you do this faster.
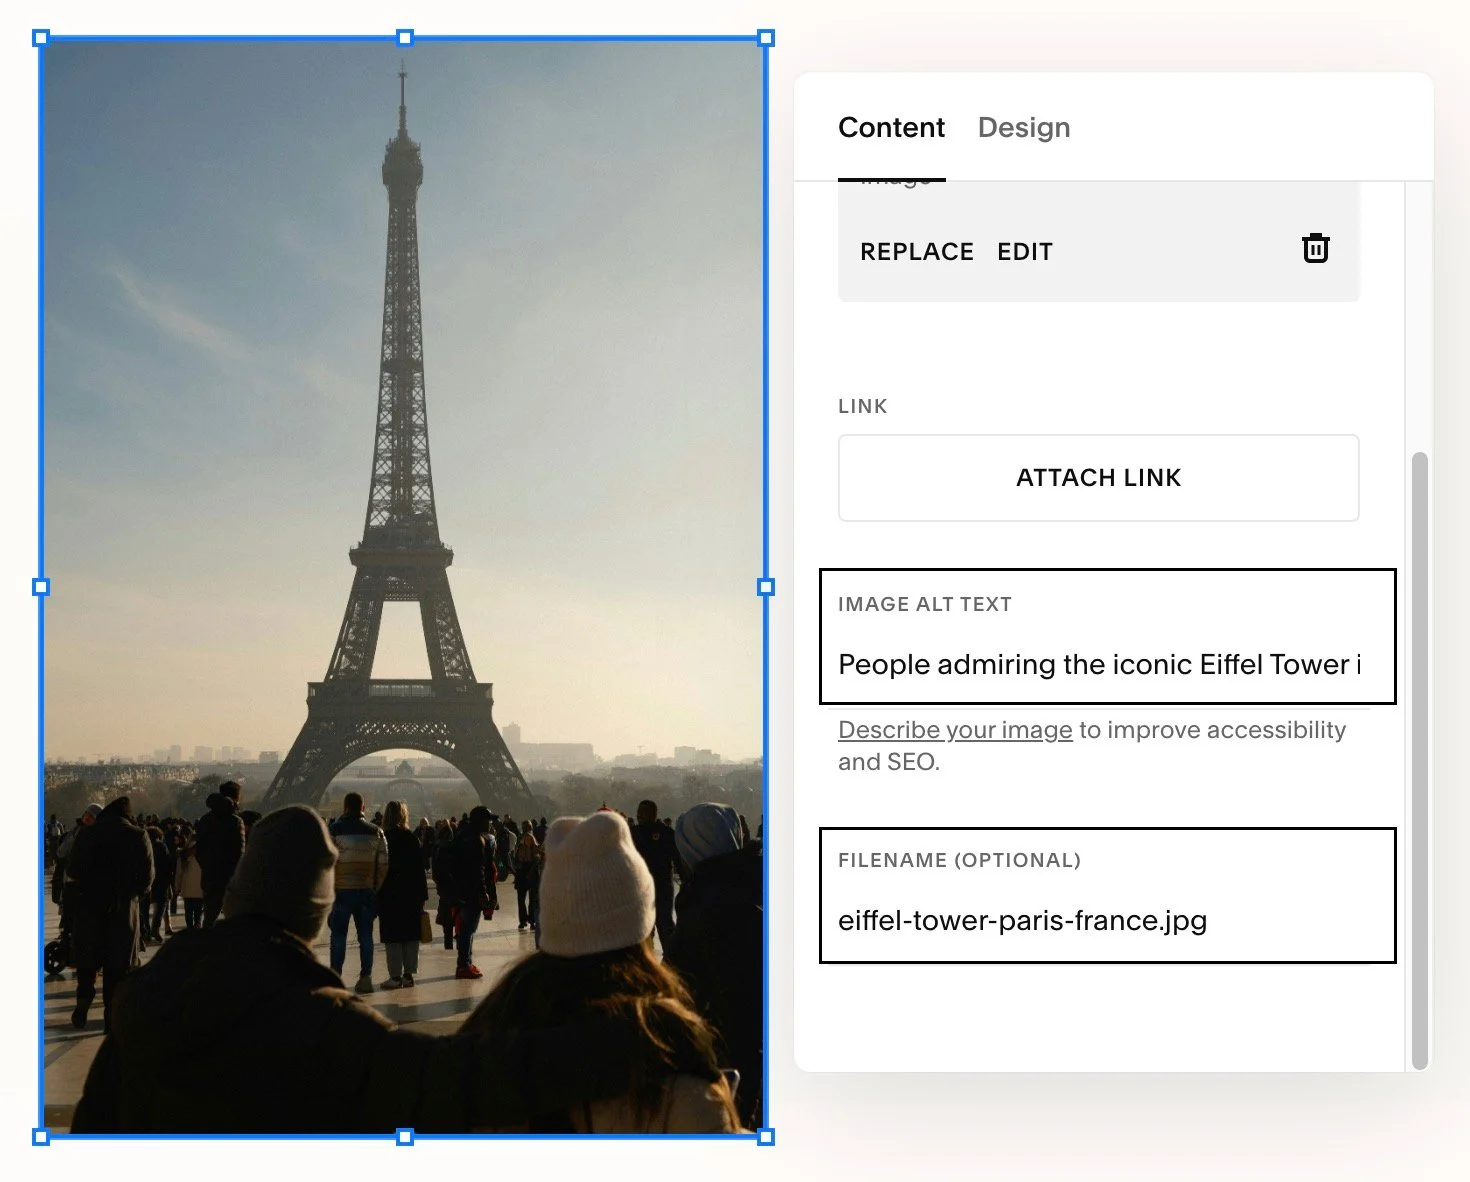
Example of how to properly fill in the alt text and file name for an image
Alt text: People admiring the iconic Eiffel Tower in Paris, France
File name: eiffel-tower-paris-france.jpg
Get Creative!
Play with different layouts and design tweaks to tell a story. High-quality photos can elevate your entire website's look and feel.